Monday, December 31, 2012

Wild Side New Years Eve Look


The Look: Wild Side

The Why: It's a great way to brighten up that little black dress! The black lace dress is by Nightcap Clothing and shoes are Report Signature

Feather earrings are from karmaloop.com


The Steps: Starting with a clean, moisturized face, my first step is always the eye makeup. Do your eyes first!!!
Once they're done you'll be able to clean up any eye shadow fallout or smudges that may have happened while you were at work without worrying about screwing up your foundation, concealer, etc.


For the Eyes:
1 -Apply an eyeshadow primer on upper and lower eyelids, sweeping out across the brow bone towards your temples.
2 -Use a white eyeliner pencil and fill in your eyelid below the crease. Blend this up and out towards your brow. This provides a better base for the shadow to stick to. 
3 -For the center of the eye, apply a light but bright color, I chose a matte yellow, using a patting motion. 

4 -Next I applied a champagne gold color onto the brown bone, the inner corners of the eyes, and a bit on top of the yellow. 

5 -Start working out towards the corners of the eyes. Apply a darker shade (I chose a bright shimmery violet, and working into the crease of the eyelid. If you'd like you can add this darker color to the inner portion of the eyelid, just inside of where you have your lightest shade on the upper eyelid. Putting a darker color can add more depth and shape to your eyes, *however*, if you have smaller eyes you may want to opt out of this. The lighter you keep the inner corners of your eyes, the more open you make them appear. 

6 -In between your darker violet and the yellow, I applied a bit of a pale pink/purple shade I had throughout and just above the crease to help blend the two shades together.


7 -Finally take deep colors such as blue violet, smoky plum, or charcoal, and apply with a small brush to the outer V portion of your eyelid (imagine where the upper and lower lids meet). You can sweep some of the darker shade beneath the outer portion of your lower eyelids, and can use this color both to line your upper eyelids as well as be drawn out towards the temple to create more of a cat eye effect.

8 -Line the waterline with a white eye liner, and pull it out across the temple under your cat eye if you chose to make one. 

9 -Take a black eyeliner to define the outer edges of your winged look, and you can create a second wing below the white eyeliner, along the lower lashes as I did.

10 -Fill brows in with a pencil and extend just a bit past the natural brow line. I like doing this when I have winged eyeliner as I feel it helps balance the look. 

11 -Blend shadow with a fluffy brush to soften the look.

12 -Apply mascara and clean up around eyes wherever you had fallout from your eyeshadow. Apply falsies for more drama!


For the Face:
1 -Apply a foundation primer to help foundation go on smoothly and last longer.
2 -Apply your concealer in the desired places, if needed. Blend.
3 -Apply foundation, if desired. Liquid, powder, whatever works best for you.
4 -Choose a blush that is going to apply softly. A pinky-peach tone works nicely on pretty much everyone if you're not sure what to choose. 
5 -Contour with a bronzer in the hollows of your cheeks, sweeping up around the temples and down around the jaw line.
6 -A highlight shade is optional but can be a nice touch when applied to the upper portion of the cheekbonesbridge of the nose, and cupid's bow.


For the Lips:

1 -Make sure they're well exfoliated and I find it useful to apply lip balm about 30 minutes prior to whenever I'm going to wear lipstick.

2 -Take a peachy nude lipliner, and lightly line lips.


3 -Apply a coat of sheer pink gloss.

You're done! Much easier for touch ups and no worrying about smudged lipstick!

For any questions or further directions please comment! Instructions written by guest writer, Amanda Brady.


Sunday, December 30, 2012

Classic New Years Eve Look

The black and white patterned dress is Armani Exchange and the black pumps are Dolce Vita


The Look: Classic

The Why: Neutral eyes and red lips go with everyone, and you can wear it with many different outfits. If you're a cool skin toned person, choose beige and taupe toned colors for the eyes, and a blue based red for the lips. If you have a warmer skin tone, go with neutrals that lean more towards the gold family and an orange based red for the lips.


The Steps: Starting with a clean, moisturized face, my first step is always the eye makeup. Do your eyes first!!!
Once they're done you'll be able to clean up any eye shadow fallout or smudges that may have happened while you were at work without worrying about screwing up your foundation, concealer, etc.


For the Eyes:
1 -Apply an eyeshadow primer on upper and lower eyelids, sweeping out across the brow bone towards your temples.
2 -Use a white eyeliner pencil and fill in your eyelid below the crease. Blend this up and out towards your brow. This provides a better base for the shadow to stick to. 
3 -For the center of the eye, apply a light, shimmery neutral. Something along the lines of champagne or a pale gold color. Use a brush to pat this onto the center of your eyelid. Take this same color, and apply just below the lower lash line and the inner corner of your eye. 
4 -Sweep your palest highlighter across the brow bone.
5 -Start working out towards the corners of the eyes. Apply a darker shade of neutral in the outer corners of the eyes, and working into the crease of the eyelid. Think coppers for warmer tones and light sandy browns for cooler. If you'd like you can add this darker color to the inner portion of the eyelid, just inside of where you have your lightest shade on the upper eyelid. Putting a darker color can add more depth and shape to your eyes, *however*, if you have smaller eyes you may want to opt out of this. The lighter you keep the inner corners of your eyes, the more open you make them appear. 

Earrings and necklace Kay Jewelers. 

6 -Finally take deep colors such as plum, dark brown, smoke, even a dark navy would work, and apply with a small brush to the outer V portion of your eyelid (imagine where the upper and lower lids meet). You can sweep some of the darker shade beneath the outer portion of your lower eyelids, and can use this color both to line your upper eyelids as well as be drawn out towards the temple to create more of a cat eye effect.
7 -Line the eyes with a dark brown or black pencil. If you have small eyes stick to a thinner line, keep it only on the outer corners of the eye, or skip it all together. 
8 -Fill brows in with a pencil and extend just a bit past the natural brow line. I like doing this when I have winged eyeliner as I feel it helps balance the look. 
9 -Blend shadow with a fluffy brush to soften the look.
10 -Apply mascara and clean up around eyes wherever you had fallout from your eyeshadow.

For the Face:
1 -Apply a foundation primer to help foundation go on smoothly and last longer.
2 -Apply your concealer in the desired places, if needed. Blend.
3 -Apply foundation, if desired. Liquid, powder, whatever works best for you.
4 -Choose a blush that is going to apply softly. A pinky-peach tone works nicely on pretty much everyone if you're not sure what to choose. 
5 -Contour with a bronzer in the hollows of your cheeks, sweeping up around the temples and down around the jaw line.
6 -A highlight shade is optional but can be a nice touch when applied to the upper portion of the cheekbones, bridge of the nose, and cupid's bow.

For the Lips:
1 -Make sure they're well exfoliated and I find it useful to apply lip balm about 30 minutes prior to whenever I'm going to wear lipstick. 
2 -Take a red lipliner, and slowly working from the inner portions of your lips out towards the edge, fill your lips in entirely. This again will make your lipstick last longer, and if throughout the night it starts to wear off, it will look much less splotchy and uneven. 
3 -If you have a lip brush, use that to apply your lipstick. If not, carefully fill in your lips the same way you did with the liner, working from the center out. 
4 -Blot, then very lightly apply a second layer.
You're done!
For any questions or further directions please comment! Instructions written by guest writer, Amanda Brady. 


Saturday, December 22, 2012

5 Nails of Christmas Tutorial

To start I painted each nail a solid color.
I used Scene Steel-er by Ulta, 4518 by Wet N' Wild, and Blue Streak by Ulta.


I used white, black and gold Art Deco fine tip nail polish for the following additions.These can be found at the dollar store for $1.25.


Using my Art Deco white I started each nail. Except the pinky which was the same red Wet N' Wild color.

2nd step was added. Head on the snowman, more stripes on the candy cane, more to the snowflake, a belt on the santa and the top of santa's hat.
Added a black hat on the snowman, a gold buckle on santa's belt and the bottom of santa's hat.


I added eyes and a mouth on the snowman, Buttons on Santa's belt, and more to the snowflake.


A Snowman, Candy cane, Snowflake, Santa's Belt, and Santa's hat.


Comment with any questions. This is a very basic tutorial. For holiday nails!


Tuesday, December 18, 2012

December Festivities

My mom loves getting family photos every year in December. She has done this since I was born and its a tradition we have continued ever since. It's not always easy and convenient, but because we know our mom loves it, we do it! This year we got matching shirts for the pictures. We were all together at Wal-Mart on Black Friday and figured it was a perfect time to agree on something to wear. This was the chosen one, a flowy short sleeve sequined top with dolman sleeves which came in several colors. The brand is No Boundaries and the shirt was only $12.
These are my sisters Chailah, Kendrah and myself in our matching shirts!

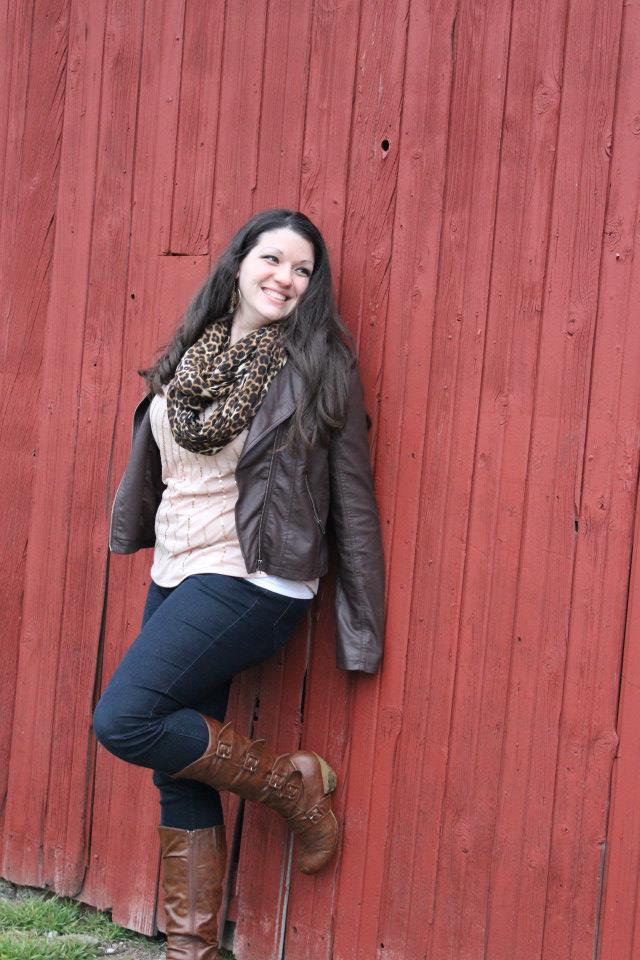
The leopard print infinity scarf doesn't have a tag so I'm not sure of the brand. I purchased it at Plato's Closet for $3. I am wearing the same No Boundaries top as the above photo. 

The dark blue skinny jeans are City Streets which I purchased from JCP for $8 during a buy one get one half off sale 2 years ago.

These camel brown boots are MIA Amore. They were bought at Plato's Closet for $12.

This chocolate brown jacket is the same jacket featured in Part 3 - Red and Brown. It is Xhilaration, which I purchased at Plato's Closet for $8.

These photos were taken by my moms friend Robin Collins Lott at her home in Vestaburg, MI.

Sunday, December 9, 2012

An $8 outfit - Thrifting!

Thrift shopping is one of my favorite hobbies! The saying, "one person's trash is another person's treasure" is so true! I love seeing the things people donated to the stores to sell and I love finding hidden gems. I live in Lansing, Mich. which is the capital city. There are a number of second hand and thrift stores in the area and I regularly visit a handful of them. Volunteers of America is one of my favorite.

The trick to thrift shopping is to have an open mind and patience. I go into the stores with very little expectations, maybe hoping to find some pants or sweaters, nothing too specific. As I shop I take a stroll through each section. If I'm looking for pants, I go through the pants rack and give every item a glance. Hidden gems are just that, hidden! You have to look through everything to find the good ones.

I visited Volunteers of America and put a couple outfits together pretty quickly for blog posts. The reason it was so easy is because I didn't have to actually find my size, etc. Finding an outfit in my size and style would take longer but I just wanted to show an example of how easy thrift shopping can be!  So I grabbed a few familiar name brands and created a casual outfit. I totaled the price for the 5 piece outfit and it was only $8!

Here we have a long sleeve button down top, a scarf, a purse and embellished leggings.

This style of purse is very trendy right now, this particular purse was selling for $1.99 and there wasn't a tag on the inside, so I don't know the brand name.
This royal blue long sleeve is from Express, it was selling for $.99 at Volunteers of America. The nude pink scarf was only $1.99 and didn't have a tag with the brand name.
These embellished leggings were from Justice, which is for teens but this pair was size 18 which would fit an adult. They were being sold for $.99.


A side view of the Michael Kors heels.
These black stylish heels from Michael Kors were only $1.99,  a great deal!! 

Volunteers of America runs specials, the day we visited all red tag items were 50% off. Sales change often, and run for one week at a time.